

Desired State Configuration #3.1 – Lessons learned – Powershell-Skripte
This post might contain affiliate links. We may earn a commission if you click and make a purchase. Your support is appreciated!
Wie ich in meinem letzten Blog-Beitrag geschrieben habe, musste ich meine DSC-Entwicklungsumgebung komplett neu aufbauen, was sehr ärgerlich war, aber mir eben auch einen Neuanfang bescherte. Da ich bereits bei meinen ersten Versuchen mich hin und wieder geärgert hatte, dass ich alles manuell gemacht habe, mussten nun ein paar Skripte gebaut werden, damit auch alles nachvollziehbar und reproduzierbar ist. Da ich mir sicher sein wollte, auch im Falle eines Re-Deployments, alles identisch aufzusetzen.
Meine Test-Umgebung in Azure
Das Aufsetzen der Maschinen in Azure ist im Grunde jedem selber überlassen, wie er es macht, hier kommt mein Ansatz um preisgünstige, identische Maschinen auszurollen, die nur aus dem Betriebssystem Windows 2016 Datacenter und 4 Datenplatten bestehen. Zusätzlich habe ich – aus Kostengründen – einen automatisierten Shutdown-Schedule eingefügt, da ich das Stoppen der Maschinen manchmal vergesse.

Clear-Host
#
# Login into Azure and define which Subscription should be used
#
Write-Host "Defining Azure Credentials"

$azureAccountName ="xxxxxxxx-xxxx-xxxx-xxxx-xxxxxxxxxxxx"
$azurePassword = ConvertTo-SecureString "XYZ" -AsPlainText -Force
$psCred = New-Object System.Management.Automation.PSCredential($azureAccountName, $azurePassword)
$mySubscriptionID = 'xxxxxxxx-xxxx-xxxx-xxxx-xxxxxxxxxxxx'

function Login
{
    Add-AzureRmAccount -Credential $psCred -ServicePrincipal -TenantId "xxxxxxxx-xxxx-xxxx-xxxx-xxxxxxxxxxxx" | Out-null
}

Write-Host "Credentials defined"
Login
####

Set-AzureRmContext -SubscriptionId $mySubscriptionID | Out-null

# Variables for SQL Server VM
## Global
$servername = "SQLVM04"
$resourcegroupname = "RG-SQLServer-Testumgebung"

## Storage
$vm_storagename = "rgsqlservertestumgebungd"
$vm_storagesku = 'Premium_LRS'

## Network
$vm_publicIPName = $servername + '-ip'
$vm_interfacename = $servername + '-nic'
$vm_vnetname = "Demo-VNet"
$vm_subnetname = 'Standard'
$vm_VNetAddressPrefix = '10.1.0.0/16'
$vm_VNetSubnetAddressPrefix = '10.1.0.0/24'
$vm_TCPIPAllocationMethod = 'Dynamic'
$vm_domainname = $servername + 'domain'

##Compute
$vm_vmname = $servername
$vm_computername = $vm_vmname
$vm_size = 'Standard_DS1_v2'
$vm_osdiskname = $servername + '_OSDisk'

##Image
$vm_publishername = 'MicrosoftWindowsServer'
$vm_offername = 'WindowsServer'
$vm_sku = '2016-Datacenter'
$vm_version = 'latest'

Clear-Host
$ErrorActionPreference = "Stop"

#
#   Process
#
# Start
Write-Host "Starting with 'Create Azure Virtual Machine'" -foregroundcolor "white"
Write-Host "Checking if Resourcegroup exists..." -foregroundcolor "white"

# Create a resource group
Get-AzureRmResourceGroup -Name $resourcegroupname -ev notPresent -ea 0 | out-null
if ($notPresent) {
    Write-Host $resourcegroupname "does not exist... have to create it..." -foregroundcolor "DarkYellow"
    New-AzureRmResourceGroup -Name $resourcegroupname -Location $location | Out-null
    Write-Host $resourcegroupname "successfully created" -foregroundcolor "white"
} else {
    $location = (Get-AzureRmResourceGroup -Name $resourcegroupname).Location
    Write-Host $resourcegroupname "already exists" -foregroundcolor "green"
}

# Storage
Write-Host "Checking if StorageAccount exists..." -foregroundcolor "white"
Get-AzureRmStorageAccount -ResourceGroupName $resourcegroupname -Name $vm_storagename -ev notPresent -ea 0 | out-null
if ($notPresent) {
    $StorageAccount = New-AzureRmStorageAccount -ResourceGroupName $resourcegroupname -Name $vm_storagename -SkuName $vm_storagesku -Kind "Storage" -Location $location | out-null
} else {
    Write-Host "StorageAccount" $vm_storagename "already exists" -foregroundcolor "green"
    $StorageAccount = Get-AzureRmStorageAccount -ResourceGroupName $resourcegroupname -Name $vm_storagename
}

# Network
Write-Host "Configuration of Network Objects..." -foregroundcolor "white"
Get-AzureRmVirtualNetwork -ResourceGroupName $resourcegroupname -Name $vm_vnetname -ev notPresent -ea 0 | out-null
if ($notPresent) {
    $SubnetConfig = New-AzureRmVirtualNetworkSubnetConfig -Name $vm_subnetname -AddressPrefix $vm_VNetSubnetAddressPrefix #-WarningAction SilentlyContinue | Out-Null
    $VNet = New-AzureRmVirtualNetwork -Name $vm_vnetname -ResourceGroupName $resourcegroupname -Location $location -AddressPrefix $vm_VNetAddressPrefix -Subnet $SubnetConfig #-WarningAction SilentlyContinue | Out-Null
    $PublicIp = New-AzureRmPublicIpAddress -Name $vm_interfacename -ResourceGroupName $resourcegroupname -Location $location -AllocationMethod $vm_TCPIPAllocationMethod -DomainNameLabel $vm_domainname.toLower() -WarningAction SilentlyContinue | Out-Null
    $Interface = New-AzureRmNetworkInterface -Name $vm_interfacename -ResourceGroupName $resourcegroupname -Location $location -SubnetId $VNet.Subnets[0].Id -PublicIpAddressId $PublicIp.Id #-WarningAction SilentlyContinue | Out-Null
} else {
    $VNet = Get-AzureRmVirtualNetwork -Name $vm_vnetname -ResourceGroupName $resourcegroupname
    $SubnetConfig = Get-AzureRmVirtualNetworkSubnetConfig -VirtualNetwork $VNet -Name $vm_subnetname
    $PublicIp = New-AzureRmPublicIpAddress -Name $vm_publicIPName -ResourceGroupName $resourcegroupname -Location $location -AllocationMethod $vm_TCPIPAllocationMethod -DomainNameLabel $vm_domainname.ToLower() -WarningAction SilentlyContinue | Out-Null
    $Interface = New-AzureRmNetworkInterface -Name $vm_interfacename.ToLower() -ResourceGroupName $resourcegroupname -Location $location -SubnetId $VNet.Subnets[0].Id -PublicIpAddressId $PublicIp.Id
}
Write-Host "Configuration of Network Objects... successfully finished" -foregroundcolor "green"

# Compute
Write-Host "Configuration of Compute Objects..." -foregroundcolor "white"
$VirtualMachine = New-AzureRmVMConfig -VMName $vm_vmname -VMSize $vm_size -WarningAction SilentlyContinue
$Credential = Get-Credential -Message "Type the name and password of the local administrator account."
$VirtualMachine = Set-AzureRmVMOperatingSystem -VM $VirtualMachine -Windows -ComputerName $vm_computername -Credential $Credential -ProvisionVMAgent -EnableAutoUpdate -WarningAction SilentlyContinue #-TimeZone = $TimeZone
$VirtualMachine = Add-AzureRmVMNetworkInterface -VM $VirtualMachine -Id $Interface.Id -WarningAction SilentlyContinue
$StorageAccount = Get-AzureRmStorageAccount -ResourceGroupName $resourcegroupname -Name $vm_storagename
$OSDiskUri = $StorageAccount.PrimaryEndpoints.Blob.ToString() + "vhds/" + $vm_osdiskname + ".vhd"
$VirtualMachine = Set-AzureRmVMOSDisk -VM $VirtualMachine -Name $vm_osdiskname -VhdUri $OSDiskUri -Caching ReadOnly -CreateOption FromImage -WarningAction SilentlyContinue

# Image
Write-Host "Configuration of Image for the VirtualMachine..." -foregroundcolor "white"
$VirtualMachine = Set-AzureRmVMSourceImage -VM $VirtualMachine -PublisherName $vm_publishername -Offer $vm_offername -Skus $vm_sku -Version $vm_version -WarningAction SilentlyContinue

# Create the VM in Azure
Write-Host "Creation of the completely configured VirtualMachine..." -foregroundcolor "white"
New-AzureRmVM -ResourceGroupName $resourcegroupname -Location $location -VM $VirtualMachine -WarningAction SilentlyContinue

# Enable Auto-Shutdown
$VM = Get-AzureRmVM -ResourceGroupName $resourcegroupname -Name $vm_vmname
$VMResourceId = $VM.Id

$Properties = @{}
$Properties.Add('status', 'Enabled')
$Properties.Add('taskType', 'ComputeVmShutdownTask')
$Properties.Add('dailyRecurrence', @{'time'= 2300})
$Properties.Add('timeZoneId', "W. Europe Standard Time")
$Properties.Add('notificationSettings', @{status='Disabled'; timeInMinutes=15})
$Properties.Add('targetResourceId', $VMResourceId)

#Error
try {
    $ScheduledShutdownResourceId = "/subscriptions/$mySubscriptionID/resourceGroups/$resourcegroupname/providers/microsoft.devtestlab/schedules/shutdown-computevm-$vm_vmname"
    Get-AzureRmResource -Location $location -ResourceId $ScheduledShutdownResourceId -ErrorAction Stop
    Set-AzureRmResource -ResourceId $ScheduledShutdownResourceId -Properties $Properties  -Force
}
catch {
    New-AzureRmResource -Location $location -ResourceId $ScheduledShutdownResourceId -Properties $Properties  -Force
}

## Add Datadiscs
for ($i=1; $i -le 4; $i++) {
    $DiskName = "$servername-datadisk-$i"
    $VhdUri = "https://" + $vm_storagename + ".blob.core.windows.net/vhds/" + $DiskName + ".vhd"
    Add-AzureRmVMDataDisk -VM $VM -Name $DiskName -VhdUri $VhdUri -LUN $i -Caching ReadOnly -DiskSizeinGB 256 -CreateOption Empty
}

Update-AzureRmVM -ResourceGroupName $ResourceGroupName -VM $VM

# THE END
Write-Host "Script finished!" -foregroundcolor "green"
Vielleicht kann man es einfacher machen, aber da meine Ressourcengruppe bereits besteht/bestand und ich im Falle eines „Neuaufbaus“ weder meine Entwickler-Workstation und auch nicht meinen Domänen-Controller erneuern wollte, wäre dieses Skript in der Lage entweder alles komplett neu anzulegen (inkl. Ressourcengruppe und StorageAccount) oder eben auf bereits vorhandenem aufzusetzen. Ich bin also weiterhin relativ flexibel…
Was mir noch als „Fehler“ aufgefallen ist und ich noch nicht gefixt habe… es wird zwar eine Public-IP vergeben, diese aber nicht der Maschine zugewiesen (attached)… das habe ich erst einmal über das Portal korrigiert und wenn ich die Zeit dazu finde, werde ich auch das Powershell Skript anpassen.
Kurz zu den einzelnen Maschinen
Die Azure Windows Server „Standard DS1 v2“ sind derzeit mit nur 1 vCPU und 3,75GB RAM ausgestattet, verfügen über maximal 3200 IOPS und einem 7GB großen D-Laufwerk (derzeitige Kosten pro Monat – 83,45 Euro). Diese Ausstattung reicht für meine Desired State Configuration Versuche absolut aus, da es nicht um SQL Server Workloads geht, sondern rein um das automatisierte Deployment.
Die zusätzlich angehängten Datenplatten sind auch nur einfache Standard-HDD, um die Konfiguration des SQL Server gleich „richtig“ anzupassen, d.h. die Datendateien und TransactionLogFiles sowie die TempDB entsprechend aufzuteilen. Womit wir auch schon beim nächsten Powershell-Skript sind, was mir die Neu-Erstellung der Umgebung ein wenig vereinfacht hat…
Konfiguration der Ziel-SQL Server mit Powershell
Hier gibt es eigentlich keine große „MAGIC“ aber es ist halt schneller machbar und man muss nicht alle Einstellungen in den unterschiedlichen Snap-ins manuell suchen und ändern. Zumal das Initialisieren, Formatieren und Zuweisen eines Laufwerks-Buchstaben kann unter Umständen (bei der Ausstattung meiner Server 😉 ) etwas länger dauern…
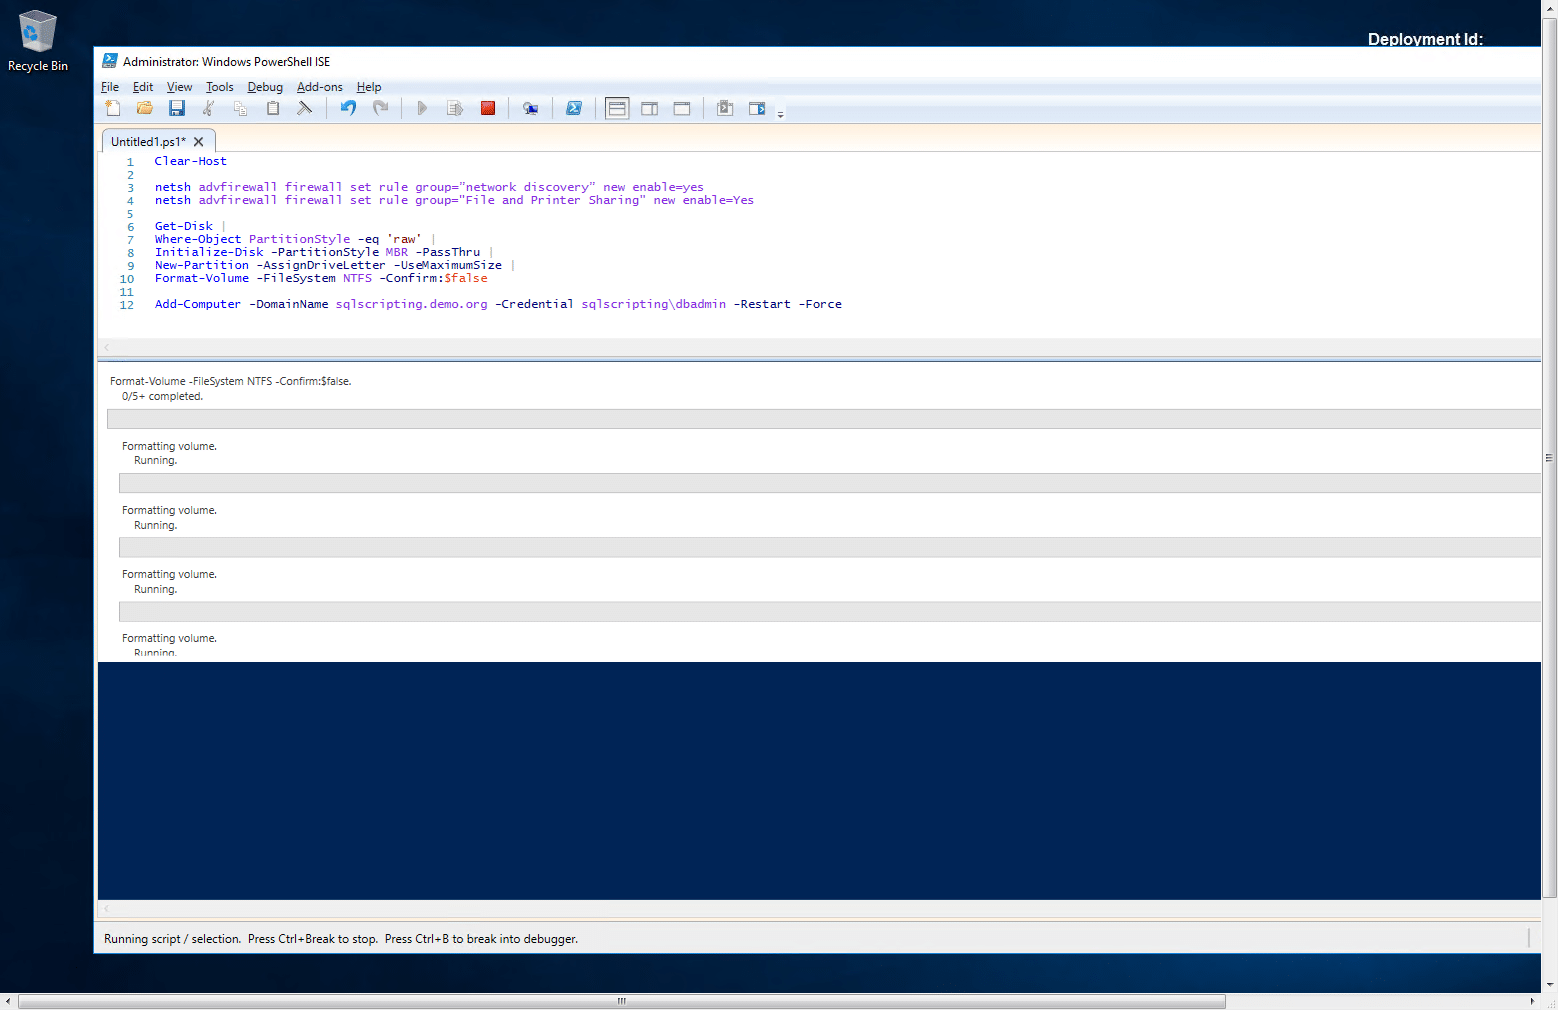
Die paar Zeilen konnte ich so aus dem Internet kopieren
Das Öffnen der Firewall um das Browsen im Netzwerk zu erlauben, ebenso um File- und Printer-Sharing zu ermöglichen kommt zum Beispiel von hier => TechNet-Forum – Windows 10 Support
- Network Discovery:
netsh advfirewall firewall set rule group=”network discovery” new enable=yes - File and Printer Sharing:
netsh firewall set service type=fileandprint mode=enable profile=all
die zweite Zeile gibt einen Fehler/Hinweis aus, dass sie mittlerweile „deprecated“ ist und man doch bitte das Kommando anpassen sollte.
netsh advfirewall firewall set rule group=”File and Printer Sharing” new enable=yes
Das Formatieren und Benennen der eingehängten Datenplatten kommt von den „Scripting Guys“
Get-Disk |
Where partitionstyle -eq 'raw' |
Initialize-Disk -PartitionStyle MBR -PassThru |
New-Partition -AssignDriveLetter -UseMaximumSize |
Format-Volume -FileSystem NTFS -NewFileSystemLabel "disk2" -Confirm:$false
Einzig NewFileSystemLabel habe ich entfernt, da ich diesen Wert nicht weiter brauche. Und zu guter letzt, das „Joinen“ der Server in die SQLScripting Domäne.
Add-Computer -DomainName sqlscripting -Credential sqlscripting\admin -Restart -Force
Vorbereitung ist alles – gerade bei Automatisierung
Also musste noch ein Skript her, welches mir meine Powershell Module immer wieder aktualisiert (wenn ich es denn möchte) und diese an den relevanten Punkten im Netz bereitstellt, so dass ich damit überall arbeiten kann. So bekommt ihr auch einen Überblick welche Powershell-Module ich alle heruntergeladen habe bzw für mein DSC-Projekt benötige. Auch hilft mir dieses Skript, diese Module zu verteilen, da ich ja von den Servern aus keinen Zugriff auf das Internet habe und alternativ muss ich die Module auf meinem Internet-PC herunterladen und sie dann manuell auf meine Entwicklungs-Workstation (ggfs ohne Internet) zu kopieren.
clear-Host

## Definde Variables
$LocalModuleDir = "C:\Program Files\WindowsPowerShell\Modules"
$RemoteModuleDir = "\\dc01\SYSVOL\sqlscripting.demo.org\DSC\Modules"

Write-Host "Starting to update local modules folder and import necessary modules"

## Check if local folder exists
Write-Host "Checking if Folder exists"
if(!(Test-Path -Path $RemoteModuleDir )){
    New-Item -ItemType directory -Path $RemoteModuleDir
} else {
    Remove-Item -Path "$RemoteModuleDir\*" -Recurse -Force
    Start-Sleep 10
}

If (Test-Connection -computer "www.google.com" -count 1 -quiet) {
    ## Internet-Connection is available
    Write-Host -ForegroundColor Green "$(Get-Date): Connection up!"

    ## Download and save modules to folder for DSC
    Write-Host "Downloading Modules from the Internet"
    Save-Module -LiteralPath $RemoteModuleDir -Name "xPSDesiredStateConfiguration" -Repository "PSGallery"
    Save-Module -LiteralPath $RemoteModuleDir -Name "dbatools" -Repository "PSGallery"
    Save-Module -LiteralPath $RemoteModuleDir -Name "xSQLServer" -Repository "PSGallery"
    Save-Module -LiteralPath $RemoteModuleDir -Name "SQLServer" -Repository "PSGallery"
    Save-Module -LiteralPath $RemoteModuleDir -Name "SecurityPolicyDsc" -Repository "PSGallery"
    Save-Module -LiteralPath $RemoteModuleDir -Name "xPendingReboot" -Repository "PSGallery"
    Save-Module -LiteralPath $RemoteModuleDir -Name "StorageDSC" -Repository "PSGallery"

    ## Load Modules for Developement and Debugging
    Install-Module -Name "xPSDesiredStateConfiguration"
    Install-Module -Name "dbatools"
    Install-Module -Name "xSQLServer"
    Install-Module -Name "SqlServer"
    Install-Module -Name "SecurityPolicyDsc"
    Install-Module -Name "xPendingReboot"
    Install-Module -Name "StorageDSC"

} else {
    ## Internet-Connection is available
    Write-Host -ForegroundColor DarkYellow "$(Get-Date): Connection missing! Working locally!"

    ## Load Modules for Developement and Debugging
    Import-Module -Name "xPSDesiredStateConfiguration"
    Import-Module -Name "dbatools"
    Import-Module -Name "xSQLServer"
    Import-Module -Name "SqlServer"
    Import-Module -Name "SecurityPolicyDsc"
    Import-Module -Name "xPendingReboot"
    Import-Module -Name "StorageDSC"
}

## Copy Modules from Download-Path to Module-Path
Write-Host "Copying Modules from $RemoteModuleDir to $LocalModuleDir"
Start-Job -Name CopyModulesJob -ScriptBlock {
    Copy-Item -Path $RemoteModuleDir -Destination $LocalModuleDir -Recurse -Force
}
Wait-Job -Name CopyModulesJob | Remove-Job

Write-Host "Module Updates successfully finished!"
Ich hoffe euch helfen meine Skripte ein wenig eure eigenen Projekte umzusetzen oder zumindest zeigen Sie euch einen Weg wie man dorthin kommen könnte. Für Fragen oder Anregungen stehe ich natürlich immer zur Verfügung bzw bin ich jederzeit offen.
Update 08. Januar 2019
Ich habe das obige Skript noch einmal angepasst, da ich für die folgende Schritte in der Automatisierung weitere Module brauche und irgendwie war mir das bei 3 Zeilen für jedes Modul einfach zu viel…
Daher habe ich die Module erst einmal in ein Array gepackt und durchlaufe das Array entsprechend. Macht die Administration des Skriptes später wesentlich einfacher 😉 ( und das Skript kürzer )
clear-Host

## Definde Variables
$LocalModuleDir = "C:\Program Files\WindowsPowerShell\Modules"
$RemoteModuleDir = "\\dc01\SYSVOL\sqlscripting.demo.org\DSC\Modules"

$NeededModules = @(
    "xPSDesiredStateConfiguration",
    "dbatools",
    "xSQLServer",
    "SqlServer",
    "SecurityPolicyDsc",
    "xPendingReboot",
    "StorageDSC",
    "NetworkingDsc",
    "xActiveDirectory",
    "ComputerManagementDsc",
    "xFailOverCluster",
    "xSmbShare"
)

Write-Host "Starting to update local modules folder and import necessary modules"
## Check if local folder exists
Write-Host "Checking if Folder exists"
if(!(Test-Path -Path $RemoteModuleDir )){
    New-Item -ItemType directory -Path $RemoteModuleDir
} else {
    Write-Host -ForegroundColor darkyellow "Folder exists - we have to clean up! Wait a moment..."
    Remove-Item -Path "$RemoteModuleDir\*" -Recurse -Force
    Start-Sleep 10
}

If (Test-Connection -computer "www.google.com" -count 1 -quiet) {
    ## Internet-Connection is available
    Write-Host -ForegroundColor Green "$(Get-Date): Connection up!"
    Write-Host "Downloading Modules from the Internet"
    for ($i=0; $i -lt $NeededModules.length; $i++) {
        Write-Host "Saving and installing Module"$NeededModules[$i].tostring()
        ## Download and save modules to folder for DSC
        Save-Module -LiteralPath $RemoteModuleDir -Name $NeededModules[$i] -Repository "PSGallery"
        ## Load Modules for Developement and Debugging
        Install-Module -Name $NeededModules[$i] -Force
    }
} else {
    ## Internet-Connection is available
    Write-Host -ForegroundColor DarkYellow "$(Get-Date): Connection missing! Working locally!"
    ## Load Modules for Developement and Debugging
    for ($i=0; $i -lt $NeededModules.length; $i++) {
        Write-Host "just importing this - '"+$NeededModules[$i]+"'"
        Import-Module -Name $NeededModules[$i]
    }
}

## Copy Modules from Download-Path to Module-Path
Write-Host "Copying Modules from $RemoteModuleDir to $LocalModuleDir"
Start-Job -Name CopyModulesJob -ScriptBlock {
    Copy-Item -Path $RemoteModuleDir -Destination $LocalModuleDir -Recurse -Force
}
Wait-Job -Name CopyModulesJob | Remove-Job

Write-Host "Module Updates successfully finished!"
This post might contain affiliate links. We may earn a commission if you click and make a purchase. Your support is appreciated!
Björn arbeitet auch weiterhin aus Griechenland als Senior Consultant – Microsoft Data Platform und Cloud für die Kramer&Crew in Köln. Auch der Community bleibt er aus der neuen Heimat treu, er engagiert sich auf Data Saturdays oder in unterschiedlichen Foren. Er interessiert sich neben den Themen rund um den SQL Server, Powershell und Azure SQL für Science-Fiction, Backen 😉 und Radfahren.
Amazon.com Empfehlungen
Damit ich auch meine Kosten für den Blog ein wenig senken kann, verwende ich auf diese Seite das Amazon.com Affiliate Programm, so bekomme ich - falls ihr ein Produkt über meinen Link kauft, eine kleine Provision (ohne zusätzliche Kosten für euch!).
Auto Amazon Links: Keine Produkte gefunden.


